 Save
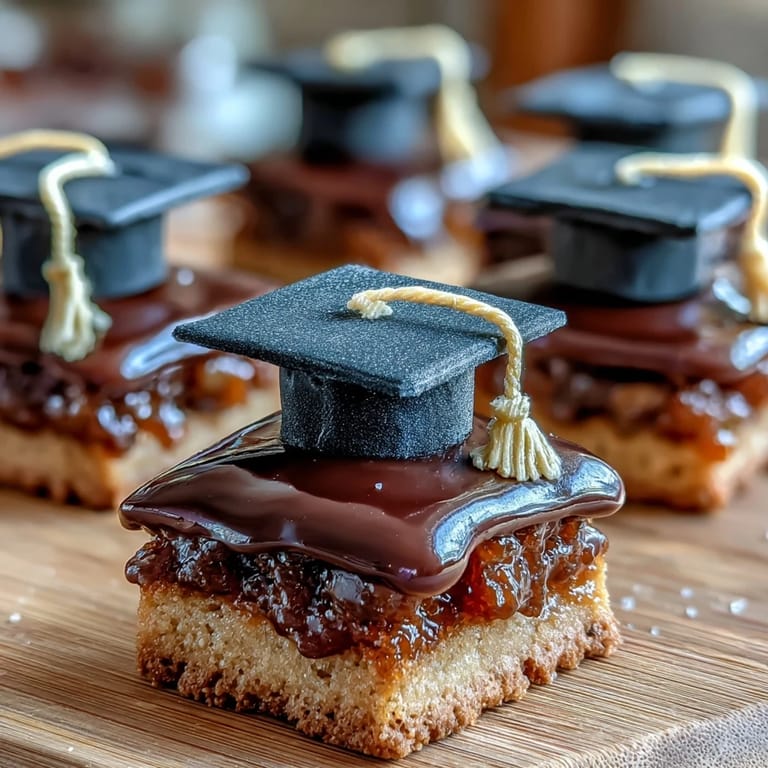
Save Last spring, my niece texted me a photo of her graduation cap mid-toss, and I found myself standing in the kitchen wondering how to turn that moment into something edible. Sugar cookies felt too simple, but then I thought about fondant and those little black mortarboards we all wore, and suddenly I was rolling fondant at midnight like it was the most important thing in the world. These cookies became my way of saying I was proud without needing a speech, and somehow they worked better than words ever could.
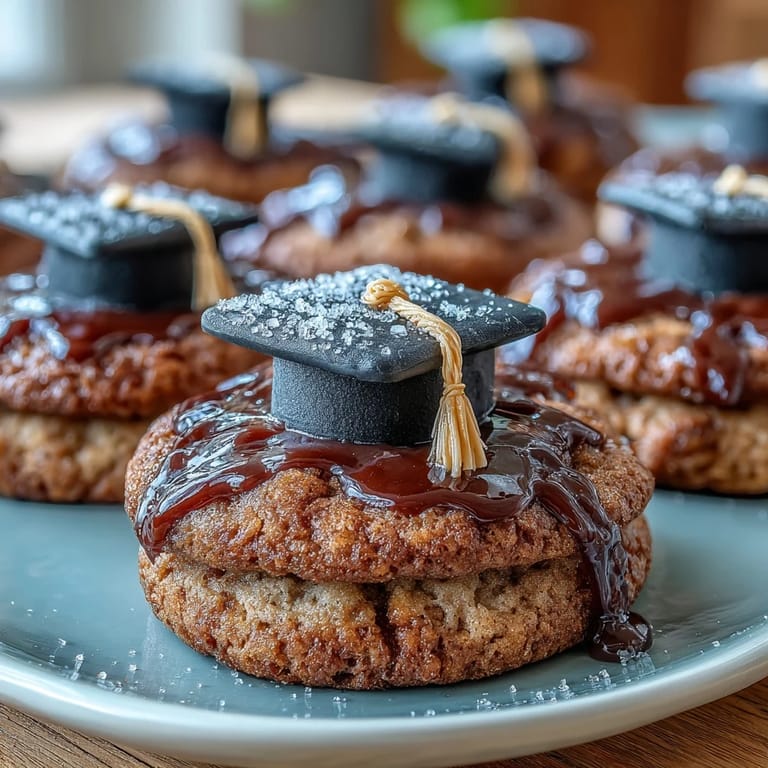
I'll never forget watching my friend's mom arrange these on a tiered cake stand at the graduation open house, and how the guests kept reaching for them even though there were fancy cupcakes right there. Someone said they were almost too pretty to eat, but then everyone ate them anyway, and that felt like the truest compliment.
Ingredients
- All-purpose flour: The foundation of a tender cookie; measure by spooning into your measuring cup rather than scooping straight from the bag, which packs it down and makes cookies dry.
- Unsalted butter: Softened, not melted, because you're building air into the dough when you cream it with sugar, and that's what makes the cookies melt-in-your-mouth tender.
- Granulated sugar: Creams beautifully with butter; don't skip the creaming step even though it feels like it takes forever.
- Pure vanilla extract: Worth buying the real stuff because the imitation kind leaves a slight aftertaste that your guests will detect even if they can't name it.
- Black fondant: The star of the show; if you can't find it pre-colored, knead in gel food coloring (not liquid, which makes it sticky) until the color is even.
- Yellow fondant: For those tiny tassels that everyone notices and comments on, making the whole project feel suddenly sophisticated.
- Powdered sugar for icing: Acts as edible glue that holds your fondant decorations exactly where you want them while they set.
Tired of Takeout? 🥡
Get 10 meals you can make faster than delivery arrives. Seriously.
One email. No spam. Unsubscribe anytime.
Instructions
- Get your mise en place ready:
- Preheat the oven to 350°F and line two baking sheets with parchment paper, because cold cookies sliding around on metal is a recipe for frustration. Have all your ingredients out and ready so you're not hunting for the vanilla halfway through mixing.
- Whisk the dry ingredients:
- Combine flour, baking powder, and salt in a bowl, making sure to break up any tiny lumps of salt so your cookies bake evenly. This takes ninety seconds and prevents dense, gritty cookies later.
- Cream butter and sugar until it's fluffy:
- This should take about two to three minutes with an electric mixer and feel almost like you're whipping clouds; if you stop too early, your cookies won't have that tender crumb. Listen for the mixer to sound slightly less thick as the mixture pales and lightens.
- Add egg and vanilla:
- Beat until fully combined and the mixture looks smooth and slightly glossy. Scrape down the bowl because there's always butter hiding at the bottom.
- Bring the wet and dry together:
- Add the dry ingredients gradually and mix just until you don't see streaks of flour anymore; overmixing develops gluten and turns your cookies tough instead of tender. This is the moment to stop even though part of you wants to keep mixing.
- Roll and cut the dough:
- Work on a lightly floured surface and roll the dough to about 1/4-inch thick, then cut into 2 1/2-inch circles or squares. You'll get about 24 cookies if you're reasonably efficient with your cuts.
- Bake until edges are just golden:
- Place cookies on prepared sheets and bake for ten to twelve minutes; the centers should look barely set while the edges turn a light golden brown. The cookies continue cooking on the hot pan after you pull them out, so don't overbake or they'll be crispy instead of tender.
- Cool completely on a wire rack:
- This matters more than you think because warm cookies are fragile and your fondant decorations will slide right off. While they cool, you can start making your mortarboards.
- Shape the fondant mortarboards:
- Dust your work surface with cornstarch and roll black fondant to about 1/8-inch thickness, then cut out 24 small squares for the mortarboard tops. Roll 24 tiny cylinders to use as the base that holds the square up off the cookie.
- Make teeny tassels:
- Roll yellow fondant into thin ropes and cut into one-inch pieces, then shape them however feels right; some people coil them, others leave them simple. This is the step that looks impressive but takes about five minutes and feels like a gift to yourself.
- Mix the icing:
- Whisk powdered sugar with milk and vanilla until it's smooth and pourable but thick enough to hold decorations in place. If it's too thin, add more sugar; too thick, add a tiny splash more milk.
- Decorate each cookie:
- Use icing to glue a fondant square in the center of each cooled cookie, then position a fondant cylinder underneath it as the base. Attach the yellow tassel to one corner with a dab of icing and let everything set for twenty to thirty minutes before serving.
 Save
Save There's something magical about watching someone's face when they bite into a cookie that's both beautiful and actually delicious, not just a decoration vehicle. These cookies somehow managed to be both, and that's when I knew they were worth making again and again.
The Science of Tender Cookies
The secret to cookies that practically melt on your tongue comes down to three things working together: proper creaming that builds air, not overmixing the flour that keeps the dough tender, and baking just until the edges set while centers stay soft. I learned this the hard way by making batch after batch of hockey pucks before understanding that more oven time is not always better. The moment I pulled a batch out when the edges were barely golden, something clicked, and I've been making perfect cookies ever since.
Fondant Decorating Feels Less Scary Once You Start
Fondant looks intimidating sitting there in its package, like you need professional training to work with it, but honestly it's just sweet dough that forgives mistakes better than actual cookie dough. You can roll it, shape it, smoosh it, reshape it again, and it doesn't care; if you mess up a mortarboard square, you just roll it back into a ball and start over. The only real rule is to keep your hands slightly oiled or the surface dusted with cornstarch so it doesn't stick, and then you're basically playing with fancy Play-Doh.
Making These For Different Occasions
Once you have the basic cookie and mortarboard technique down, the decorating becomes infinitely customizable for any celebration that calls for it. I've made these in school colors by mixing fondant with gel food coloring, in wedding colors with tiny bouquets instead of tassels, and even in holiday themes by swapping the mortarboard for little Santa hats.
- Color the fondant ahead of time to match your occasion, using gel food coloring instead of liquid because it doesn't change the fondant's texture.
- Store unfrosted cookies in an airtight container for up to five days, then decorate them the day you need them for the freshest look and taste.
- If you're making these for a party weeks away, you can freeze the unbaked dough for up to three months, then thaw and bake when you're ready.
 Save
Save These cookies became my go-to graduation gift because they're personal enough to feel handmade but polished enough to feel intentional. Every time someone celebrates a milestone, I think about rolling that fondant and remember that the best gifts usually involve showing up in the kitchen and making something with your own hands.
Questions & Answers
- → What flour type is best for these cookies?
All-purpose flour provides the right structure and texture, making cookies soft yet sturdy enough for fondant decorations.
- → How do I prevent fondant from sticking while shaping?
Lightly dust the work surface and rolling pin with cornstarch to keep the fondant from sticking during rolling and cutting.
- → Can I customize the fondant colors?
Yes, decorating fondant can be colored using gel food colors to match any theme or school colors desired.
- → What’s the ideal thickness for rolling cookie dough?
Roll dough to about 1/4-inch thickness to ensure even baking and a solid base for decorations.
- → How long should decorated cookies set before serving?
Allow the icing and fondant decorations to set for 20 to 30 minutes at room temperature before serving or packaging.