 Save
Save My sister texted me three weeks before her graduation asking if I could make her cake, and honestly, I panicked for about five seconds before remembering I had actually nailed a two-tier cake at a friend's wedding the year before. The memory came flooding back: the satisfying hum of the mixer, butter and sugar becoming this pale, fluffy cloud, and that moment when you realize the whole thing is going to actually work. This vanilla sponge cake with its creamy buttercream layers became my go-to celebration cake after that, and now I make it whenever someone needs a cake that feels both fancy and genuine.
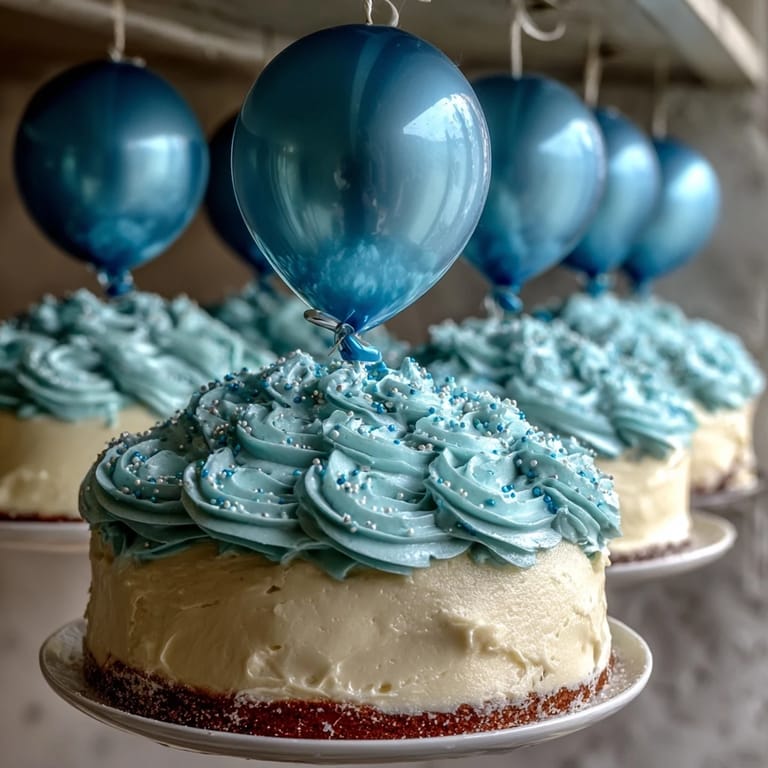
What I didn't expect was watching my mom cry when she saw the finished cake sitting on our kitchen counter, all white and elegant with those colorful balloons on top. She kept saying it looked like a celebration, like we were really marking this moment, and I realized the cake had become part of the story itself rather than just dessert.
Ingredients
- All-purpose flour (4 1/2 cups): This is your structure, and getting it measured correctly makes the difference between a dense brick and a tender crumb.
- Baking powder (3 1/2 tsp): Fresh baking powder matters here; stale baking powder is why cakes sometimes refuse to rise.
- Salt (1/2 tsp): A tiny pinch that makes the vanilla shine instead of tasting flat and one-dimensional.
- Granulated sugar (2 1/2 cups): This creams with butter to trap air, which is literally what gives you that light, tender crumb.
- Unsalted butter (1 1/2 cups plus 2 cups for frosting): Room temperature is non-negotiable; cold butter won't cream properly and you'll end up with a dense cake.
- Large eggs (8): Room temperature eggs integrate smoothly into the batter instead of forming little streaks that never quite blend.
- Pure vanilla extract (2 tbsp plus 2 tbsp): The quality matters more here than anywhere else; cheap vanilla tastes thin and artificial.
- Whole milk (2 cups for cake, 1/2 cup for frosting): Room temperature milk prevents the batter from seizing up when it hits the butter mixture.
- Powdered sugar (8 cups): Sift it before measuring or you'll end up with buttercream so stiff you'll need to thin it with extra milk.
- Gel food coloring: Gel doesn't add moisture like liquid food coloring does, so your frosting stays spreadable.
- Balloon cake toppers and edible confetti: These transform a simple frosted cake into an actual party centerpiece that people will photograph.
Tired of Takeout? 🥡
Get 10 meals you can make faster than delivery arrives. Seriously.
One email. No spam. Unsubscribe anytime.
Instructions
- Heat your oven and prep your pans:
- Set the oven to 350°F and take a moment to grease those four cake pans thoroughly, then line the bottoms with parchment paper so your cakes slide out without drama. This is the one thing that seems fussy but actually saves you an enormous amount of frustration.
- Combine your dry ingredients:
- Whisk flour, baking powder, and salt together in a medium bowl, which distributes the leavening evenly so you don't get random dense pockets. This step takes two minutes and prevents most of the cake failures I used to have.
- Cream butter and sugar until clouds form:
- In a large bowl, beat room-temperature butter and sugar for about 3 to 5 minutes until the mixture looks pale, fluffy, and noticeably lighter than when you started. You're literally incorporating air, which is your secret weapon for a tender cake.
- Add eggs one at a time with patience:
- Drop in each egg and beat well after each addition so it fully emulsifies into the butter mixture. Rushing this step and dumping all the eggs in at once creates a broken, separated-looking batter that never quite recovers.
- Mix in vanilla extract:
- Stir in 2 tablespoons of vanilla extract until the whole mixture smells incredible and tastes like the vanilla came from somewhere real.
- Alternate flour and milk gently:
- Starting and ending with the flour mixture, add everything in three additions while keeping the mixer on low speed. This prevents overworking the batter and keeps your cake tender rather than tough.
- Divide batter between pans:
- Split the batter evenly between the 8-inch and 6-inch pans, filling each pair equally so both cakes bake at roughly the same rate. A gentle tap on the counter releases any trapped air bubbles.
- Bake with intention:
- The 8-inch cakes need 35 to 40 minutes while the 6-inch cakes finish in 25 to 30 minutes; they're done when a toothpick inserted in the center comes out clean or with just a few moist crumbs. Start checking a minute or two early so you catch them at their peak.
- Cool with restraint:
- Let cakes sit in their pans for 10 minutes to set slightly, then turn them out onto wire racks to cool all the way down. Trying to frost a warm cake is an invitation to melted frosting disaster.
- Beat butter until it's actually creamy:
- For the frosting, beat butter alone for a minute or two until it's pale and fluffy, which makes a difference in the final texture. This is the kind of detail that separates silky frosting from grainy, dense frosting.
- Add powdered sugar gradually while beating:
- Slowly add sifted powdered sugar to the butter, beating between additions so lumps don't hide in the frosting. A smooth frosting is infinitely easier to spread than one with little gritty pockets.
- Mix in vanilla, salt, and milk to perfection:
- Add vanilla and salt, then add milk or heavy cream 1 tablespoon at a time until the frosting reaches that ideal spreadable consistency. Too thick and you're fighting it with your spatula; too thin and it slides off the cake.
- Tint with color if you're feeling celebratory:
- If you're using the graduate's school colors, add gel food coloring a tiny bit at a time and mix thoroughly. It takes less than you think, and you can always add more but can't take it back.
- Level those cake tops:
- If the tops of your cakes domed up during baking, carefully slice them level using a serrated knife so each layer sits flat. This makes stacking infinitely easier and your cake won't wobble halfway through the celebration.
- Build the base tier:
- Place one 8-inch cake layer on a cake board or plate, spread a generous layer of buttercream on top, then add the second 8-inch layer. The buttercream should be thick enough to hold the cake up but not so thick it squishes out the sides.
- Repeat for the top tier:
- Do the exact same thing with the two 6-inch cakes, building a smaller version of what you just made. Now you have two complete cakes before they ever go near each other.
- Apply a crumb coat and chill:
- Spread a thin layer of buttercream over each cake to trap any stray crumbs, then pop both cakes into the fridge for 20 minutes. This crumb coat is why your final frosting looks polished instead of speckled with cake particles.
- Frost your cakes smooth:
- Remove cakes from the fridge and apply your remaining buttercream in thick, even layers, using an offset spatula and a cake turntable if you have one. Work in smooth motions rather than frantic jabbing, and remember that frosting doesn't need to be perfect to look beautiful.
- Stack with support:
- Center the 6-inch tier on top of the 8-inch tier, and insert wooden dowels or sturdy straws into the bottom tier first if you're worried about stability. These supports prevent the top tier from sinking into the frosting and ruining your whole moment.
- Crown it with balloons:
- Place your balloon toppers wherever feels celebratory, scatter edible confetti or sprinkles around the base, and step back to admire what you've created. This is the moment everything clicks into place and it stops being just a cake.
 Save
Save My brother stood in the kitchen at midnight the night before graduation, watching me put the final touches on the cake, and he said it looked like a celebration, like we were all proud of her and the cake was there to prove it. That's when I understood that the best recipes aren't just about technique; they're about showing up for the people you love in a way that feels thoughtful and a little bit fancy.
The Two-Tier Strategy
Two tiers intimidate people, but honestly they're easier than one massive cake that's hard to maneuver and harder to frost evenly. The secret is treating each tier as its own complete cake first, frosting it separately, then stacking them only once they're both perfect. I learned this the hard way after trying to frost a two-tier cake while it was already stacked, which resulted in smeared frosting and a silent cry of frustration. Now I build them separately, chill everything, and only combine them at the very end when I know both tiers are actually frozen stable. It feels like more work but it's actually less stressful because you're not juggling a three-foot-tall cake that might topple at any moment.
Making Your Frosting Actually Spreadable
Buttercream frosting is forgiving, but only if you understand that temperature and sugar-to-fat ratio are everything. I've made frosting that was stiff enough to patch drywall and frosting that slid off the cake like you'd applied melted ice cream, and both situations are entirely preventable. The butter needs to be soft enough that you can press your finger into it without too much resistance, and the milk gets added in tiny increments so you're constantly tasting and adjusting. Some people swear by shortening mixed into the buttercream to prevent it from melting under warm kitchen lights, which is brilliant if you're decorating in summer or under stage lights at an actual graduation ceremony.
Decoration Ideas That Feel Special
Balloon toppers are wonderful because they're a visual shorthand for celebration, but you can personalize them however you want without making the cake harder to build. The simplest decorations are often the most elegant, and honestly a perfectly frosted cake with nothing but a few sprinkles looks more sophisticated than one that's covered in complicated piping.
- You can find balloon toppers online for a few dollars, or make them by attaching mini balloons to cake-safe wooden sticks with hot glue.
- Edible confetti scattered loosely around the base looks intentional and festive without requiring any actual skill to apply.
- If you want to add the graduate's name or school colors, do it with buttercream in a piping bag rather than buying pre-made toppers, which feels more personal.
 Save
Save This cake has become my graduation tradition, the thing I make whenever someone I love is starting a new chapter. It's moist enough to stay delicious for days and fancy enough that it feels like you made an actual effort, which honestly is the best kind of celebration cake to have in your back pocket.
Questions & Answers
- → What type of flour is best for this cake?
All-purpose flour provides the right balance of structure and tenderness needed for the moist vanilla sponge layers.
- → How do I prevent the cake layers from drying out?
Ensure not to overbake and cool the layers properly before applying buttercream to maintain moisture and softness.
- → Can I use a different frosting besides buttercream?
Yes, whipped cream or cream cheese frosting can be alternatives, but buttercream offers a stable layering and smooth finish.
- → How do I stack the tiers safely?
Use cake dowels or sturdy straws inserted into the bottom tier to support the upper tier and prevent collapsing.
- → What are some decoration alternatives to balloon toppers?
Edible confetti, sprinkles, or fresh flowers can also create festive and elegant decorations.
- → Is this suitable for special dietary needs?
This version is vegetarian but contains gluten, eggs, and dairy; adjustments are needed for other dietary restrictions.